
How to Remove Bathroom Sink Drain – Step by Step Guide

Struggling with a slow-draining sink or a clogged bathroom drain? Removing and cleaning your bathroom sink drain doesn’t have to be a daunting task.
Whether you’re dealing with a buildup of hair and gunk, or you just want to give your sink a thorough clean, this guide will walk you through the process step by step.
By the end of this article, you’ll know how to remove your bathroom sink drain properly and reassemble it to ensure everything functions seamlessly.
Tools and Materials You’ll Need
Before you begin, gather all the necessary tools and materials to make the process smooth and hassle-free. Here’s what you’ll need:
- Wrench or pliers: To loosen tight nuts.
- Bucket: To catch water and debris.
- Flashlight: Helpful if it’s dark under your sink.
- Scrub brush: For cleaning your sink stopper and pipes.
- Soap or cleaning product: For washing away grime and buildup.
- Vinegar (optional): A natural alternative for cleaning.
- Hair clog removal tool: To remove hair and debris from the drain.
- Plumber’s putty: To seal any connections if needed.
Now that you’ve got your tools ready, it’s time to roll up your sleeves and get started.
Step 1 – Clearing the Area
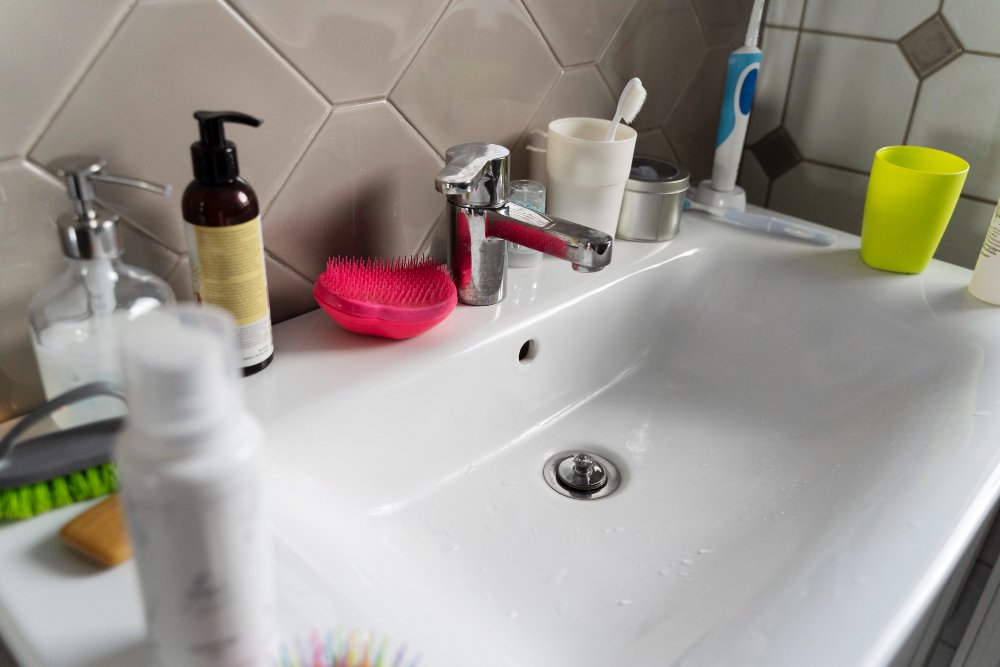
Before beginning, create a clear and organized workspace beneath your sink. Start by removing any items stored under the sink, such as cleaning supplies, toiletries, or miscellaneous items.
Not only will this give you more room to work, but it will also protect your belongings from accidental water drips or debris during the process.
Use a flashlight to improve visibility if the area under your sink is dimly lit. It’s helpful to have a bucket on hand and place it directly beneath the drain to catch water, debris, or grime during the cleaning process.
A few old towels or rags can also be handy for wiping up spills or keeping your workspace clean and dry.
Step 2 – Disconnecting the Stopper
Locate the sink stopper mechanism underneath your bathroom sink. At the base of the sink, you will find a connection that holds the stopper in place. This could be a metal rod or a plastic clip depending on your sink’s setup.
Carefully disconnect this component using your hands, or if it feels stuck, use a wrench or pliers for extra grip.
Once disconnected, gently lift the stopper out of the sink basin from above. This small but critical piece is often the source of clogs, as it tends to trap hair, soap scum, and other debris over time. Be sure to inspect it for grime buildup. If necessary, set it aside for cleaning later.
Step 3 – Removing the Plunger Rod
Next, locate the plunger rod, which connects the stopper to the lifting mechanism on your faucet. The plunger rod is usually attached to a metal strap under the sink using a small metal spring clip. Carefully slide off the spring clip to detach the rod.
Once the spring clip is removed, gently disconnect the rod from the strap. Take note of how the components are connected, as you’ll need to reassemble them later.
The plunger rod is an important part of the sink’s stopper system, so ensure you do this step carefully to avoid damaging it.
Step 4 – Unscrewing the Pivot Nut
Find the pivot nut, located on the side of the drainpipe where the plunger rod connects. This nut secures the rod inside the drainpipe.
Using a wrench or pliers, carefully unscrew the pivot nut, being mindful not to apply too much pressure to avoid cracking the pipe or the nut itself.
Make sure your bucket is positioned directly under the pipe during this step, as water and debris may escape once the pivot nut is loosened. Unscrew the pivot nut completely and set it aside in a safe place for reassembly later.
Step 5 – Removing the Sink Stopper
After the pivot nut has been unscrewed, you can remove the sink stopper from the drain. Pull it out of the drain from above, being careful not to damage the surrounding sink area. This is a good opportunity to examine the stopper for any debris, grime, or buildup.
For a more thorough clean, soak the stopper in warm, soapy water or a vinegar solution for 10–15 minutes. Use a scrub brush or an old toothbrush to remove any stubborn grime or residue.
If the stopper looks worn or damaged, consider replacing it with a new one for optimal performance.
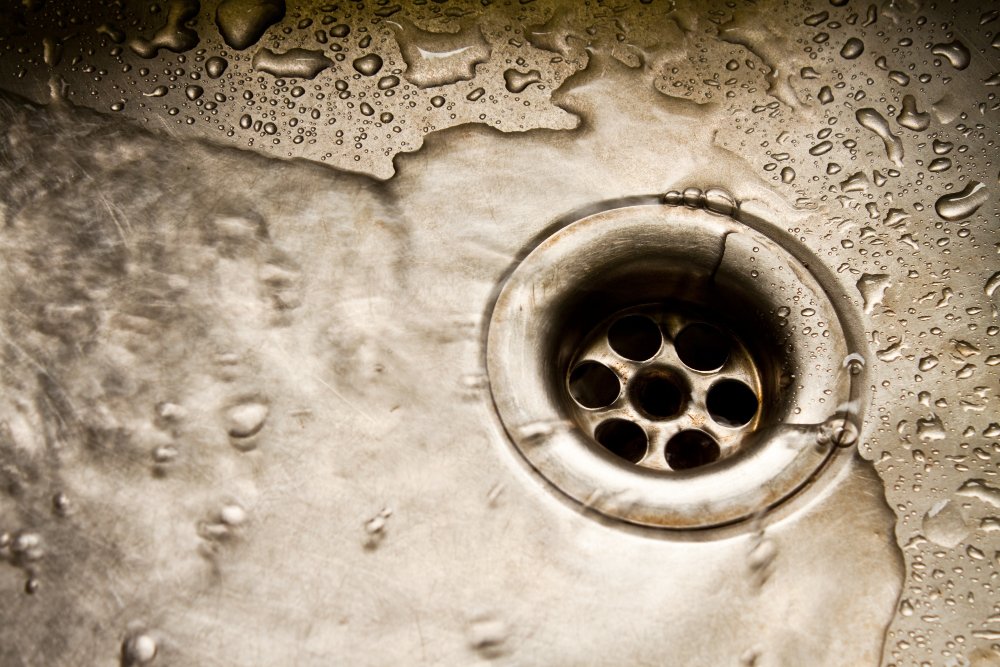
Step 6 – Cleaning Out the Drain
With the stopper removed, it’s time to tackle the drain itself. Use a hair clog removal tool or a flexible drain snake to reach into the pipe and extract any debris that has collected inside. This could include hair, soap scum, toothpaste residue, or other gunk that contributes to clogs.
If the clog is deeper in the pipe, you may need to unscrew additional sections of the drainpipe for better access.
Be sure to keep your bucket in place to catch any water or debris that escapes when the pipe sections are removed. Work slowly and carefully to avoid damaging the pipe or creating leaks.
Step 7 – Rinsing the Drain
Once the debris has been removed, thoroughly rinse the drain pipe. Pour hot water down the drain to flush out any remaining grime or residue.
For an extra-deep clean, add a cleaning solution, baking soda, or a vinegar-water mixture to sanitize the pipe.
Use a scrub brush or a long cleaning tool to scrub the inside of the pipe gently, ensuring all buildup is removed.
Rinse again with hot water to leave the pipe clean and clear. This step will help prevent future clogs and keep your sink draining smoothly.
Step 8 – Reassembling the Drain
Now that the cleaning is complete, it’s time to reassemble the drain system. Start by reattaching any sections of the drainpipe that you unscrewed during the cleaning process.
Make sure each connection is tightened securely, but be careful not to overtighten, as this could damage the fittings or cause leaks.
Next, drop the cleaned stopper back into the sink’s drain hole. Ensure it sits snugly and aligns properly with the lifting mechanism below. Double-check that all components are in their correct positions before proceeding to the next step.
Step 9 – Reattaching the Rod and Pivot Nut
Reconnect the plunger rod to the strap under the sink using the metal spring clip. Slide the clip securely into place, ensuring the rod is properly aligned with the stopper mechanism.
Then, tighten the pivot nut back onto the side of the drainpipe where it connects to the plunger rod. Make sure the nut is secured firmly but avoid overtightening, as this could damage the pipe or threads.
Finally, test the stopper by lifting and lowering it using the lever on your faucet. If the stopper moves freely and seals the drain properly, you’ve successfully reassembled your bathroom sink drain!
Keep Your Drain in Top Shape
Regular maintenance is key to avoiding future drain issues. Here are a few tips to keep things running smoothly:
- Use a drain cover to catch hair and prevent clogs.
- Flush the drain regularly with hot water or a baking soda and vinegar solution.
- Clean the stopper every couple of months to remove debris buildup.
Final Thoughts
Removing and cleaning your bathroom sink drain is a straightforward process when broken down into manageable steps.
With the right tools and a bit of patience, you can eliminate stubborn clogs and keep your sink running properly.
However, if you encounter difficulties or suspect damage to your plumbing fixtures, don’t hesitate to call a licensed plumber for help.